

November 10, 2026

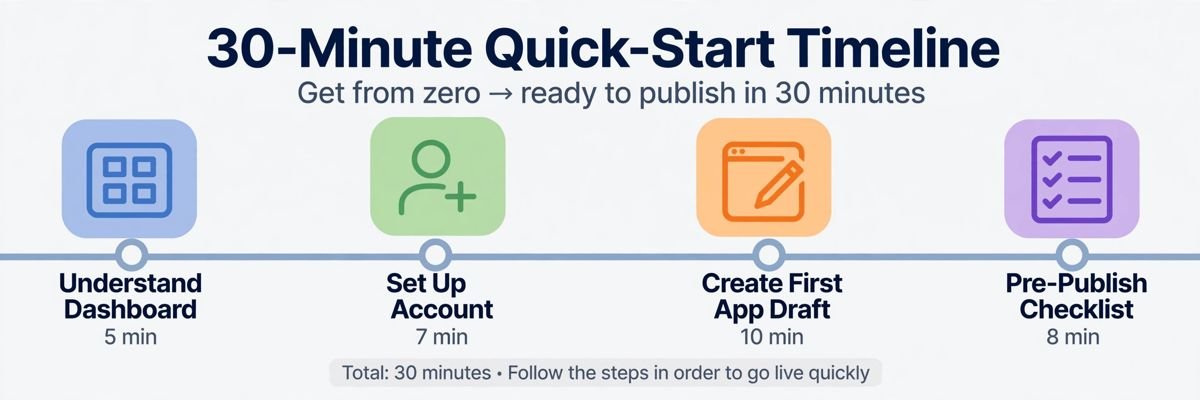
New to the Playstore Console? Your first 30 minutes in Google’s developer dashboard set the tone for everything that follows — a rushed setup can cost you weeks later. This tutorial walks you through the exact sequence: understand the dashboard, create your developer account, draft your first app, and know what’s left before you can publish. No prior Play Console experience needed.
In short: In 30 minutes you can orient yourself in the Playstore Console, create a developer account ($25 one-time), and draft your first app. This tutorial covers the account choices that matter, the app-creation form, and the pre-publish checklist — including the 14-day closed testing rule for new personal accounts.
The Playstore Console is Google’s web dashboard for Android developers — the same product as Google Play Console, just with a different name. Everything you do as an Android developer flows through it: account setup, app creation, releases, store listings, monetization, quality monitoring, and policy compliance.
Key vocabulary before you click anything:
For the full reference once you’re oriented, see our complete Google Play Console guide.
Do this once, do it right — mistakes here are expensive to unwind.
Step 1 — Pick the right Google account. Use the Google account you’ll own for years. If your apps will belong to a business, use a Google account tied to that business (ideally a Google Workspace account) — not a personal Gmail you’ll lose access to.
Step 2 — Choose personal vs. organization. Personal accounts are for individuals; organization accounts are for companies and need a D-U-N-S number for verification. This choice affects verification, your public developer name, and your ability to transfer the account later. Our developer account comparison breaks down the differences.
Step 3 — Verify identity. Google verifies who you are before you can publish. Personal accounts verify with a government ID; organizations verify with a D-U-N-S number and additional documents. Start this now — verification can take days.
Step 4 — Pay $25 and complete your developer profile. The one-time $25 registration fee unlocks publishing. After paying, fill in your developer profile: public developer name, contact email, and (for organizations) a physical address. Your developer name is public — choose it carefully, because changing it later confuses users.
The table below summarises the account-type choice:
| Personal | Organization | |
|---|---|---|
| Verification | Government ID | D-U-N-S number plus additional documents |
| Public developer name | Your name | Company name |
| Best for | Solo developers | Companies and teams |
With verification underway (you can draft while waiting), click All apps → Create app:
You now have an app dashboard. Before uploading anything, note the left rail: Release, Grow, Monetize, Quality, Policy — you’ll live in these sections. Take two minutes to click through each and read the empty-state guidance; it previews every requirement ahead.
Nothing is live yet — and that’s fine. Here’s what stands between your draft and the store, in order:
Google’s own documentation for every step is the Play Console Help Center — bookmark it.
You’ve finished the 30-minute orientation — now make the first week count. Each day has one focus:
Day 1 — Foundations. Confirm verification is underway, finish your developer profile, and invite any team members.
Day 2 — First build. Upload your first signed AAB to internal testing and confirm it installs on a test device.
Day 3 — Store listing draft. Write your app name, short description, and full description; prepare screenshots.
Day 4 — Policy declarations. Complete the content rating questionnaire, data safety, and target audience forms.
Day 5 — Closed testing. Enroll 12 testers, distribute the opt-in link, and start the 14-day clock.
Weekend — Review. Check pre-launch reports and vitals, fix the top crashes, and plan your production rollout.
The table below summarises the first-week action plan:
| When | Focus |
|---|---|
| Day 1 | Foundations — confirm verification, finish developer profile, invite team members |
| Day 2 | First build — upload a signed AAB to internal testing and confirm it installs |
| Day 3 | Store listing draft — app name, descriptions, screenshots |
| Day 4 | Policy declarations — content rating, data safety, target audience |
| Day 5 | Closed testing — enroll 12 testers, distribute the opt-in link, start the 14-day clock |
| Weekend | Review — pre-launch reports and vitals, fix top crashes, plan the rollout |

Creating a developer account costs a one-time $25 fee. After that, using the console — app creation, releases, store listings, and reports — is free. Google takes a service fee (15% on the first $1M) only when your app earns revenue.
Nothing — they’re two names for the same dashboard at play.google.com/console. “Google Play Console” is the official name; “Playstore Console” is the common shorthand. You’ll see both used interchangeably in guides and forums.
After you submit for review, new apps typically take 3–7 days. New personal accounts must also complete 14 days of closed testing with at least 12 testers before production access is granted — so the realistic timeline for a brand-new developer is roughly three weeks from account creation to a live listing.
No. A personal developer account is enough to publish apps. You only need an organization account (and a D-U-N-S number) if you’re publishing as a company, or if your app falls into a category that requires it.
An Android App Bundle (.aab). APKs are no longer accepted for new apps. Build a signed AAB from Android Studio or your CI pipeline, enroll in Play App Signing, and upload it to a testing track first.
Yes — that’s what the testing tracks are for. Internal testing (up to 100 testers, fastest), closed testing (named testers, required for the 14-day rule), and open testing (public opt-in link) all let you gather feedback before production.
Thirty minutes in the Playstore Console, done right, gives you a verified developer account, a first app draft, and a clear map of everything between you and the store. The developers who struggle are the ones who skip the orientation and upload to production on day one — don’t be one of them. Follow the checklist, start the 14-day clock early, and let the console’s own guidance fill in the details.
Play Console Store is an independent marketplace that helps Android developers through every step above — account setup, verification, closed testing coordination, and release management. Get launch-ready with our Google Play services.